> ## Documentation Index
> Fetch the complete documentation index at: https://docs.turtles.com/llms.txt
> Use this file to discover all available pages before exploring further.
# Integrations
> Connect your existing commerce platform to Turtles.
export const CopyButton = ({text}) => {
const handleClick = event => {
const button = event.currentTarget;
navigator.clipboard.writeText(text).then(() => {
const copyIcon = button.querySelector('.copy-icon');
const checkIcon = button.querySelector('.check-icon');
copyIcon.style.display = 'none';
checkIcon.style.display = 'inline-block';
setTimeout(() => {
copyIcon.style.display = 'inline-block';
checkIcon.style.display = 'none';
}, 2000);
});
};
return ;
};
### Supported platforms
* **Shopify:** Live
* **Amazon:** Coming soon
* **BigCommerce:** Coming soon
* **Magento (Adobe Commerce):** Coming soon
* **Salesforce Commerce Cloud:** Coming soon
* **WooCommerce:** Coming soon
### Connect your Shopify to Turtles
To begin, you must have 'App Development' permissions in Shopify Admin
1. Visit [https://dev.shopify.com/dashboard/](https://dev.shopify.com/dashboard/)
2. Click **Create app**, name it `Turtles` and click **Create**
1. Set the app URL to `https://app.turtles.com`
2. Set 'Scopes' to `read_products,read_inventory,write_orders`
3. Leave everything else as the default values or empty
4. Click **Release** at the bottom, and then click **Release** again when the confirmation popup is displayed
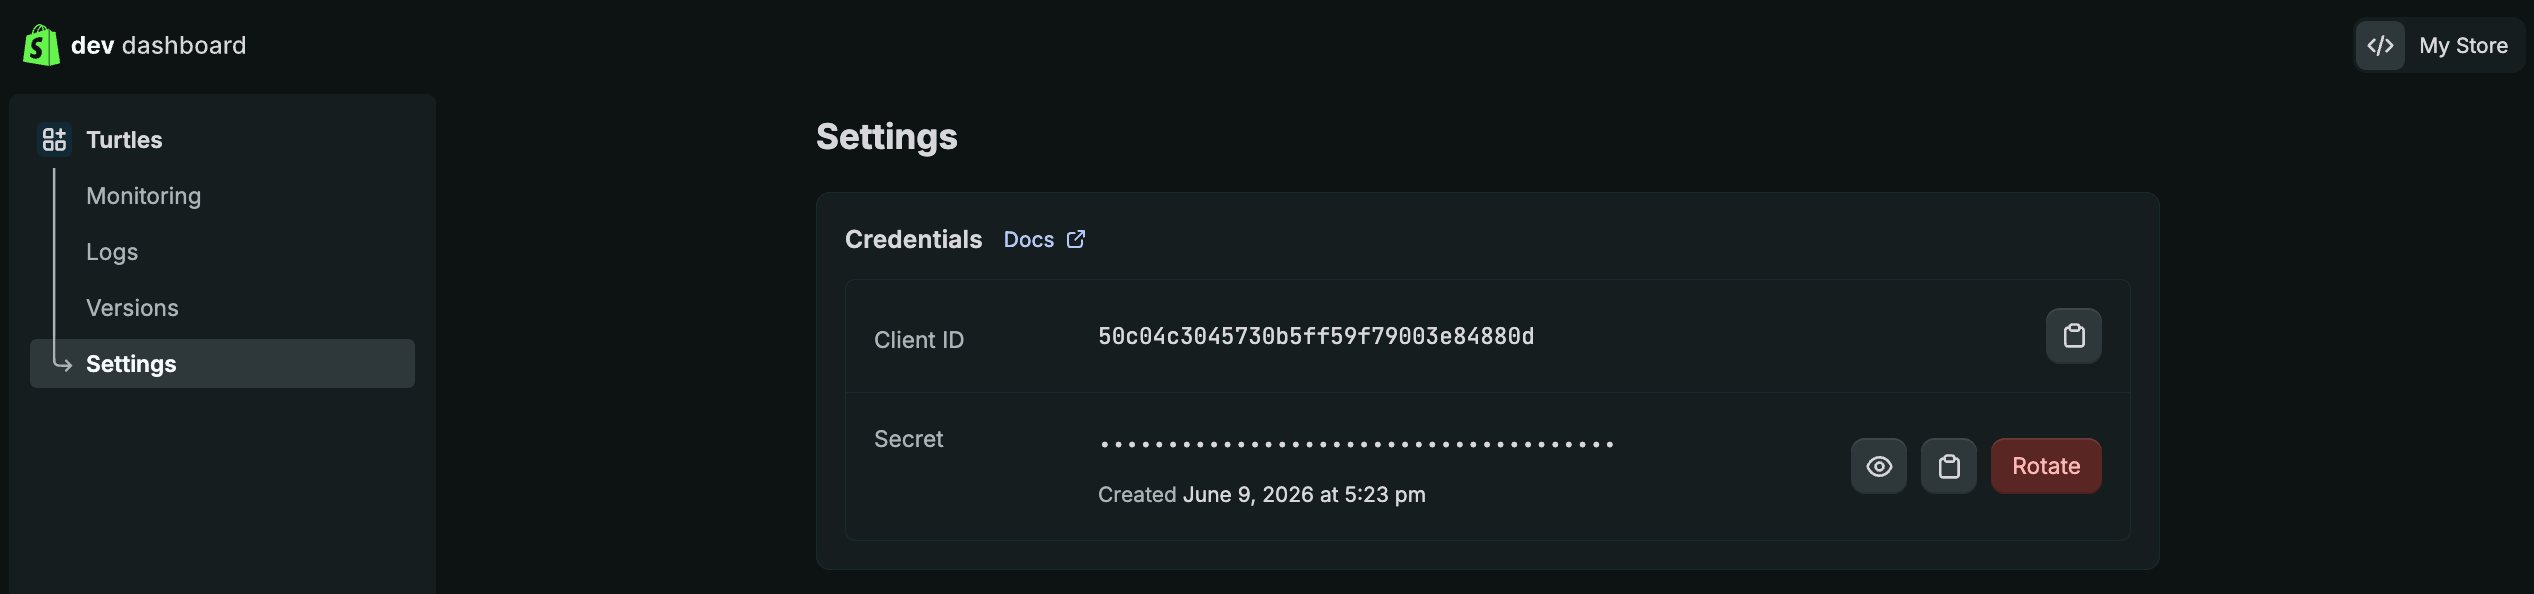
1. In the Shopify dashboard, click **Settings** from the left sidebar and copy the Client ID and secret
2. Go back to the **Turtles Portal**, and paste the Client ID and secret
3. Click **Connect Shopify**
4. Click **Install** on the Shopify installation page to finish authorizing the app
### Troubleshooting Shopify
This means the app is missing one of the 3 required scopes. Here's how to fix it:
1. Visit [https://dev.shopify.com/dashboard/](https://dev.shopify.com/dashboard/)
2. Click on the **Turtles** app to open it
3. Click **Versions** from the left sidebar
4. Click **Create version**
5. Change 'Scopes' to `read_products,read_inventory,write_orders`
6. Click **Release** at the bottom, and then click **Release** again when the confirmation popup is displayed
7. In the Shopify dashboard, click **Settings** from the left sidebar and copy the **Client ID** and **secret**
8. Go back to the **Turtles Portal**, and paste the **Client ID** and **secret**
9. Click **Install** on the Shopify installation page to finish authorizing the app
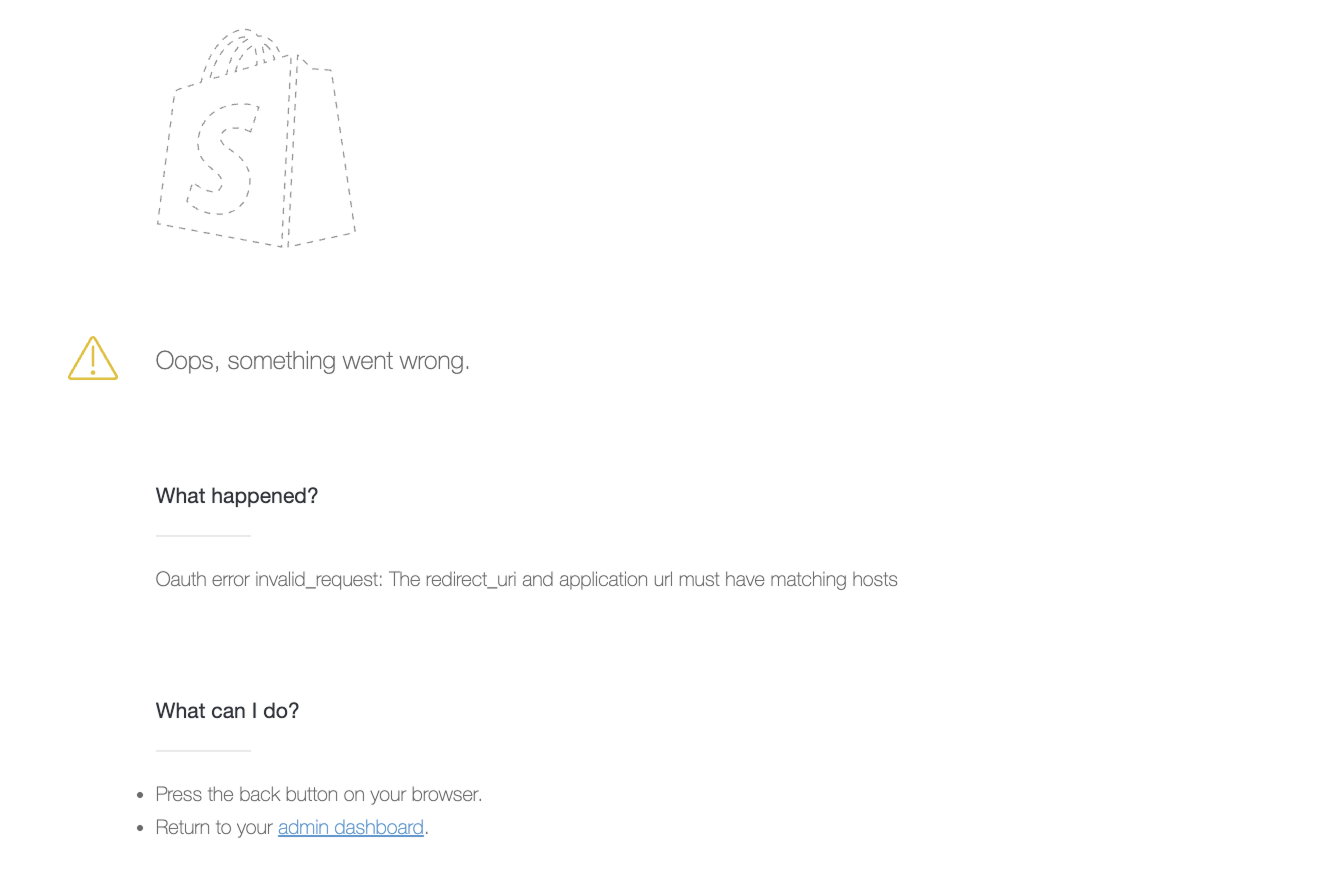
This means the App URL was entered incorrectly during app setup. Here's how to fix it:
1. Visit [https://dev.shopify.com/dashboard/](https://dev.shopify.com/dashboard/)
2. Click on the **Turtles** app to open it
3. Click **Versions** from the left sidebar
4. Click **Create version**
5. In the URLs section, change 'App URL' to `https://app.turtles.com`
6. Click **Release** at the bottom, and then click **Release** again when the confirmation popup is displayed
7. In the Shopify dashboard, click **Settings** from the left sidebar and copy the **Client ID** and **secret**
8. Go back to the **Turtles Portal**, and paste the **Client ID** and **secret**
9. Click **Install** on the Shopify installation page to finish authorizing the app
### WooCommerce Integration Guide
1. Go to: WooCommerce > Settings > Advanced > REST API.
2. Click Create an API key OR Add Key. You’ll be taken to the Key Details screen.
3. Add a Description.
4. Select the User you would like to generate a key for in the dropdown.
5. Select Read/Write access
6. Click Generate API Key, and WooCommerce creates API keys for that user.
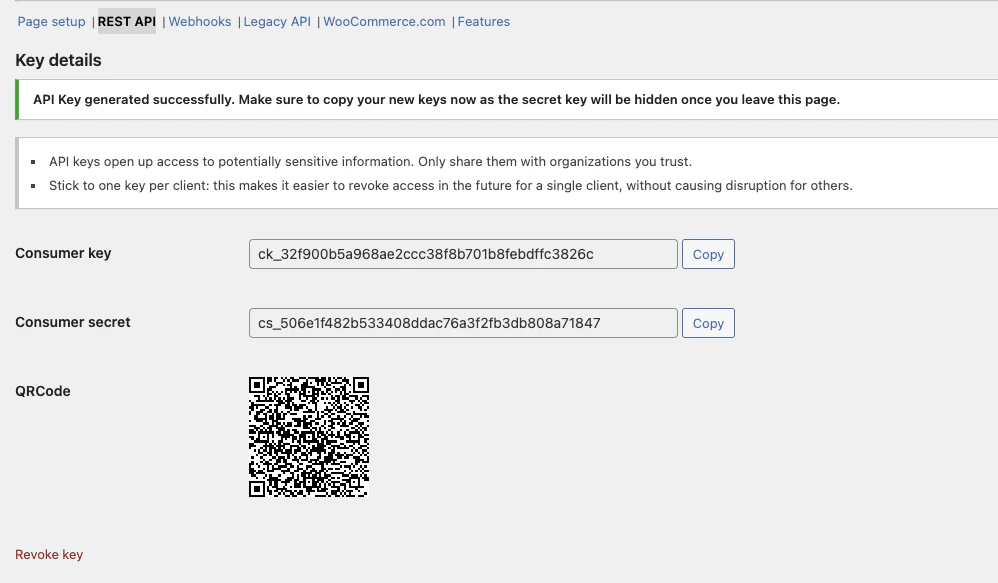
7. Now that keys have been generated, you should see Consumer Key and Consumer Secret keys.
1. Log in to your [Turtles Dashboard](https://app.turtles.com)
2. Navigate to **Settings > Integrations**
3. Click **Connect WooCommerce**
4. Fill in the Store URL, Consumer key and secret
Need help? Contact [support@turtles.com](mailto:support@turtles.com)
 This means the App URL was entered incorrectly during app setup. Here's how to fix it:
1. Visit [https://dev.shopify.com/dashboard/](https://dev.shopify.com/dashboard/)
2. Click on the **Turtles** app to open it
3. Click **Versions** from the left sidebar
4. Click **Create version**
5. In the URLs section, change 'App URL' to `https://app.turtles.com`
This means the App URL was entered incorrectly during app setup. Here's how to fix it:
1. Visit [https://dev.shopify.com/dashboard/](https://dev.shopify.com/dashboard/)
2. Click on the **Turtles** app to open it
3. Click **Versions** from the left sidebar
4. Click **Create version**
5. In the URLs section, change 'App URL' to `https://app.turtles.com` 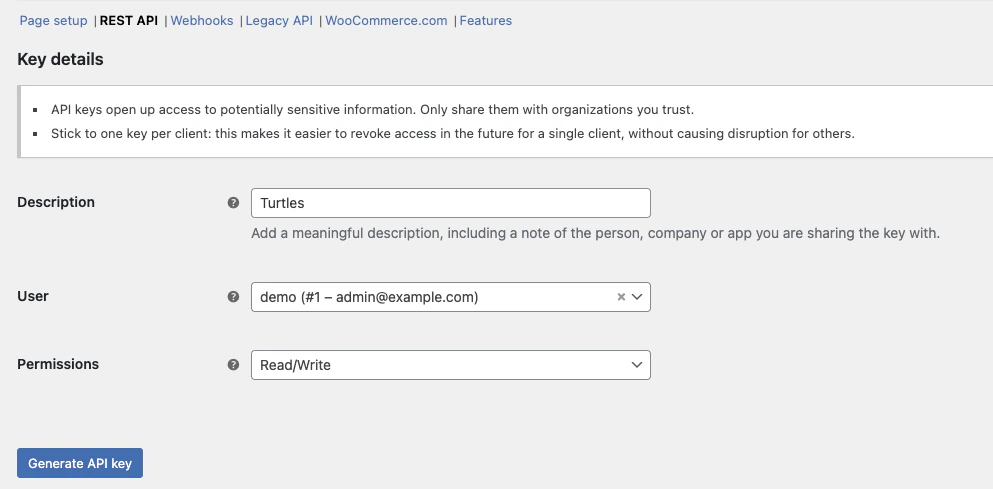 2. Click Create an API key OR Add Key. You’ll be taken to the Key Details screen.
3. Add a Description.
4. Select the User you would like to generate a key for in the dropdown.
5. Select Read/Write access
6. Click Generate API Key, and WooCommerce creates API keys for that user.
7. Now that keys have been generated, you should see Consumer Key and Consumer Secret keys.
2. Click Create an API key OR Add Key. You’ll be taken to the Key Details screen.
3. Add a Description.
4. Select the User you would like to generate a key for in the dropdown.
5. Select Read/Write access
6. Click Generate API Key, and WooCommerce creates API keys for that user.
7. Now that keys have been generated, you should see Consumer Key and Consumer Secret keys.